简介
GitHub is a web-based hosting service for projects that user the Git revision control system. It is a social networking where you can share your code.
GitHub 中的 Maven 项目一般没有本地配置文件(主要是为了去除依赖,使项目整体结构清晰)。
但是当导入 Github 的 Maven 项目,并与本地的 Eclipse 直接结成,总有些困难,直到 Eclipse 4.2(Juno). 本文介绍如何导入 github 项目,并直接与 eclipse 集成。
引文
本文是在 Windows 7 下进行,下面的软件将被安装,并使之一起工作 :
- Eclipse: Eclipse IDE(本文使用eclipse-4.2)
- Java: Java 编程语言(本文使用 java-1.7.0_05)
- Maven: Java 项目管理工具(本文使用 maven-3.0.4)
- Druid: JDBC Connection Pool(本文使用 Druid 项目为例)
条件准备
- GitHub 流程, Set up git, Create a repo, Fork a repo, Be social. 参考GitHub Help.
- 生成 ssh keys. 参考Generating SSH Keys.
- 有项目的 push 权限
- Java, Eclipse, Maven 安装正确
配置
Maven配置
Eclipse-4.2 使用的 Maven 版本默认为 maven-3.0.4, 但是还是建议设置一下:
版本设置: Window > Preferences > Maven > Installations
用户设置: Window > Preferences > Maven > User Settings
SSH 配置
SSH2 设置: Window > Preferences > General > Network Connections > SSH2
注意设置 SSH2 home 及 private keys.
导入项目
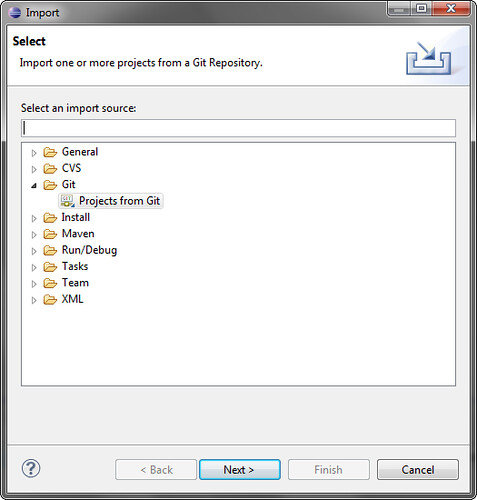
1.右键 > Import > Project from Git
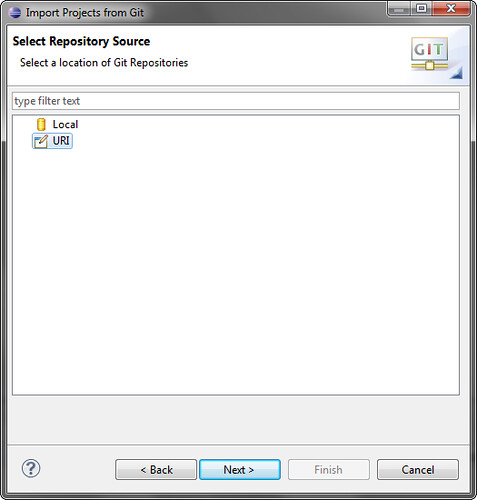
2.选择 URI
3.输入 Remote Git Repo 的配置信息
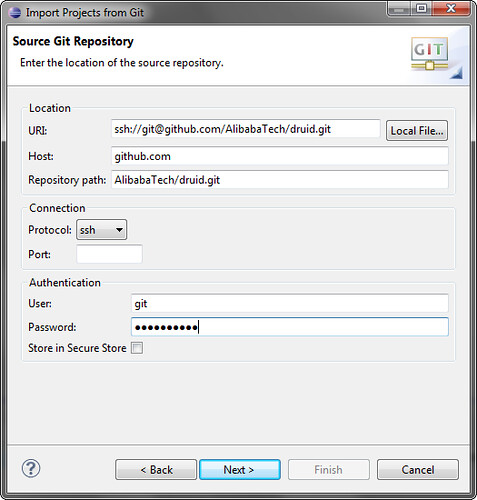
注意:Protocol 使用 ssh, User 使用 git, Password 为账户在 github 的密码
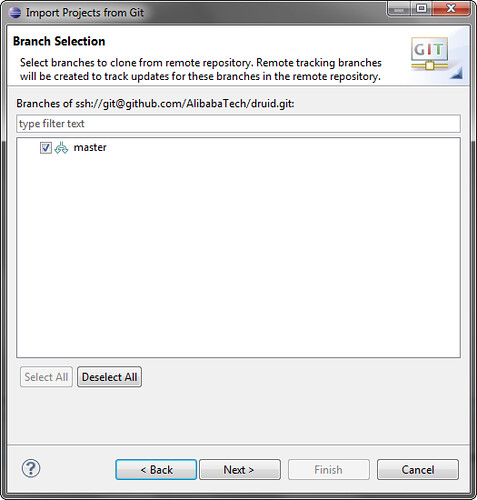
4.查找远程分支信息
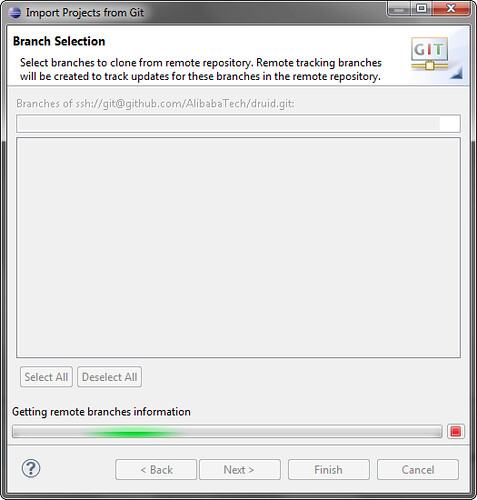
5.选择分支
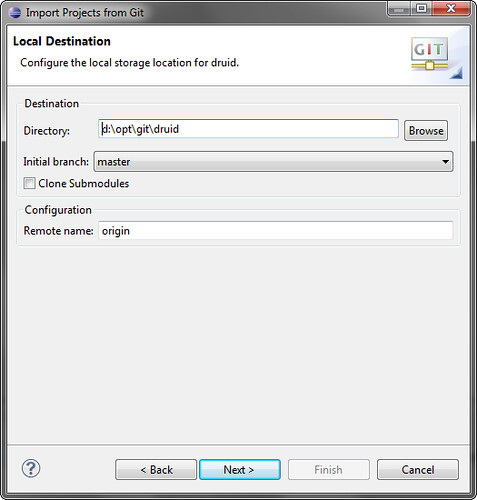
6.选择本地目标位置
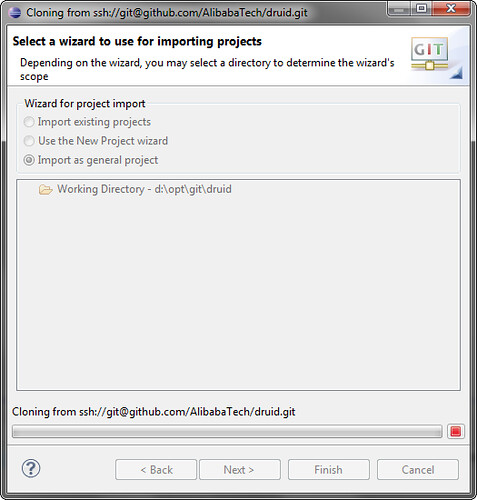
7.从版本仓库中进行 Clone
8.接受文件中

9.选择导入项目类型
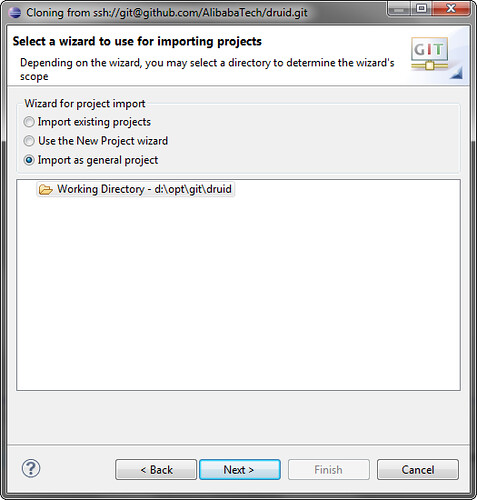
注意: 选择 Import as general project
10.确认项目名称
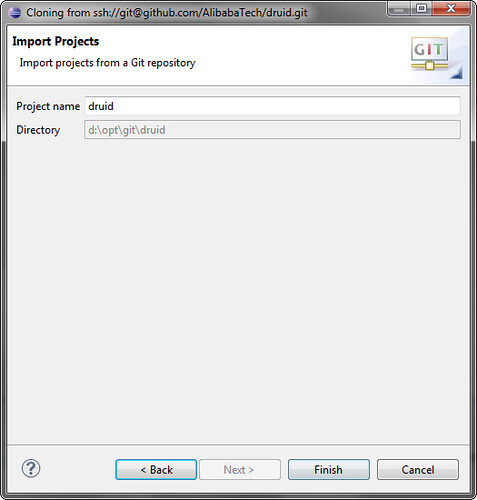
11.项目如下
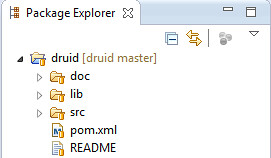
注意: 此时项目为 General Project 不是 Maven project, 需要手工修改配置文件。但是由 [druid master] 可以看出,已经是一个带版本控制的项目了。
修改项目配置文件
由于导入的是普通项目,需要转化成 Maven Project。Eclipse 中项目的主要配置文件是 .classpath 和 .project ,还有 .settings 文件夹。
原项目为 General project, 只有 .project 文件,其 .project 配置文件内容如下
<?xml version="1.0" encoding="UTF-8"?>
<projectDescription>
	<name>druid</name>
	<comment></comment>
	<projects></projects>
	<buildSpec></buildSpec>
	<natures></natures>
</projectDescription>
需要修改.project,并添加.classpath文件:
<?xml version="1.0" encoding="UTF-8"?>
<projectDescription>
	<name>druid</name>
	<comment></comment>
	<projects>
	</projects>
	<buildSpec>
		<buildCommand>
			<name>org.eclipse.jdt.core.javabuilder</name>
			<arguments>
			</arguments>
		</buildCommand>
		<buildCommand>
			<name>org.eclipse.m2e.core.maven2Builder</name>
			<arguments>
			</arguments>
		</buildCommand>
	</buildSpec>
	<natures>
		<nature>org.eclipse.jdt.core.javanature</nature>
		<nature>org.eclipse.m2e.core.maven2Nature</nature>
	</natures>
</projectDescription>
还有 .classpath 文件
<?xml version="1.0" encoding="UTF-8"?>
<classpath>
	<classpathentry kind="src" output="target/classes" path="src/main/java">
		<attributes>
			<attribute name="optional" value="true"/>
			<attribute name="maven.pomderived" value="true"/>
		</attributes>
	</classpathentry>
	<classpathentry excluding="**" kind="src" output="target/classes" path="src/main/resources">
		<attributes>
			<attribute name="maven.pomderived" value="true"/>
		</attributes>
	</classpathentry>
	<classpathentry kind="src" output="target/test-classes" path="src/test/java">
		<attributes>
			<attribute name="optional" value="true"/>
			<attribute name="maven.pomderived" value="true"/>
		</attributes>
	</classpathentry>
	<classpathentry excluding="**" kind="src" output="target/test-classes" path="src/test/resources">
		<attributes>
			<attribute name="maven.pomderived" value="true"/>
		</attributes>
	</classpathentry>
	<classpathentry kind="con" path="org.eclipse.jdt.launching.JRE_CONTAINER/org.eclipse.jdt.internal.debug.ui.launcher.StandardVMType/J2SE-1.5">
		<attributes>
			<attribute name="maven.pomderived" value="true"/>
		</attributes>
	</classpathentry>
	<classpathentry kind="con" path="org.eclipse.m2e.MAVEN2_CLASSPATH_CONTAINER">
		<attributes>
			<attribute name="maven.pomderived" value="true"/>
		</attributes>
	</classpathentry>
	<classpathentry kind="output" path="target/classes"/>
</classpath>
刷新项目
在项目上右键 > Refresh.
如果还有错误,可以在项目上右键 > Maven > Update project.. > OK, Eclipse 会自动重新建立 .settings 文件夹。
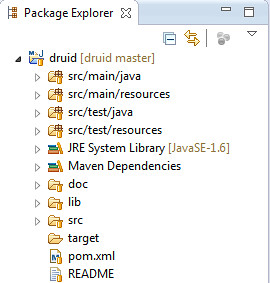
此时项目完成,可以直接提交到 GitHub 了。
参考
Using the EGit Eclipse Plugin with GitHub.
EGit User Guide
Git with Eclipse (EGit) - Tutorial